Learn to make your own
Super cute Kindle cover - can be adapted for the Nook, Ipad, etc.


This Kindle cover will fit the 1st and 2nd generation Kindle. It is a simple design and can be modified to fit any size reader or Ipad. First, choose the fabric you want your cover made of. You can use different fabrics for the inside and outside of the cover but for this tutorial, I used the same for inside and outside.
Cut two rectangles from your fabric that measure 9 1/2 inches by 14 1/2 inches. Also, cut a piece of batting the same size. In the past, I have used two pieces of batting - one that is basted to the fabric that will be the inside of the cover you are making and one that will be basted to the fabric that will be the outside. But, with two pieces of batting, it becomes too much bulk to fit under the presser foot and the commotion caused by trying to shove it under while preventing my finger from getting snagged is just too much excitement for me. I stick with one piece of batting. I used Warm and Natural 100% cotton.
Grab a can of quilt basting spray. This isn't absolutely essential but will make things go a little smoother when you join the inside and outside fabric. You could pin it, I suppose. I despise anything that requires pinning, so I go the easy (lazy) route. Baste the batting to the wrong side of either the inside fabric or the outside fabric. It makes absolutely no difference whether you choose the inside or outside fabric.
When you have basted it, you will have something that looks like this.
Place your two pieces of fabric right sides together. One piece will have the batting you just basted on. Stitch along both long sides and one short side, using 1/4 inch seam. Leave one short side open for turning.
You should have something that looks like this.
Turn it inside out so the right sides of your fabric are showing on the outside.
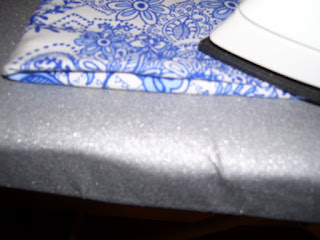
Press the opening by folding 1/4 inch or so under on the open side. It takes serious talent to take a picture while ironing.
Topstitch the opening closed with a 1/4 inch seam, making sure to catch both layers of fabric that you pressed. You can do with with a decorative stitch but I was in a hurry so just plain old topstitch for me.
At this point, you have basically enclosed a piece (or two pieces if you are brave) of batting between two layers of fabric and sealed up all the edges. If you want to quilt your cover, now is the time to do that. I didn't quilt mine. Place the Kindle in the center the fabric and fold it over to get an idea of how deep you want the pocket. Once you have determined where you will begin sewing, you can mark it or pin it. I didn't do either - I just kept my place as I moved it over to the machine.
Using a 1/4 inch seam (the 1/4 inch part is pretty important here because if you use more than 1/4 inch, your Kindle may not fit in the pocket), top stitch the flap down on one side and then on the other side.
You have a pocket to put the Kindle in and a flap to cover it up with. I wanted to be able to fully close my Kindle cover so I am adding a snap. Besides, I will come up with any excuse in the world to add a snap to something because I am in love with my snap pliers. I mean, who wouldn't love this thing?
My snap pliers, the snaps and the awl. Isn't it beautiful? If you don't have snap pliers, you can buy the metal snaps at any craft/fabric store and most Wal-Mart type stores. Most of the packages come with the tool required to attach that type of snap. Or, if you don't want to do that, you can attach a button to the lower part of the front of the cover and add some type of loop (elastic) to attach to the button. You would need to take about an inch of the seam out of the upper part of the front cover so that you can insert some elastic (a pony tail holder works beautifully) with enough sticking out to reach the button. Once you have inserted the elastic, you would reclose the seam with topstitch. But, I am adding a snap, so on we go.
Eyeball it and determine the center for placement of your snap. If you are really particular and eyeballing it won't work for you, grab a tape measure and mathematically determine the exact center. But, I have made alot of these and I promise, eyeballing it works just fine.
Using the awl, score your fabric for placement of the snap on the flap of the cover. Place snap.
I know it's difficult to see but there is a snap behind my finger and the pencil. Using the snap on the flap as a guide, mark the fabric in the pocket for placement of the bottom snap. Use the awl to score the fabric on the pocket and then place snap.
Insert Kindle into finished product and ....
Snap closed.
And then take pictures and blog it.


No comments:
Post a Comment